MATERIALS
-Printed windmill template (from online)
-Hot glue gun
-Aluminum pie tin (2)
-BBQ lighter
-Tape
-Scissors
-Ruler
-4 small candles
-Hex nut
-Wooden skewer (20 cm long)
-Straw
-Modelling clay
METHOD
- Cut the edge off one of the metal pie tins using scissors.
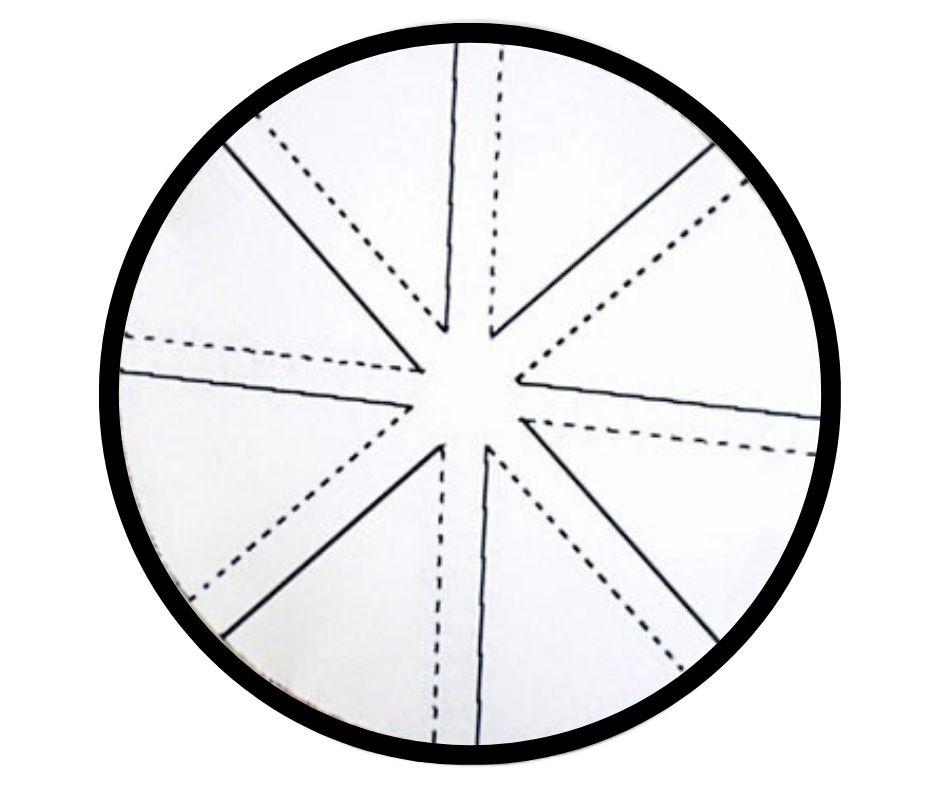
- Tape the printed windmill template to the aluminum circle. Cut along the solid lines using scissors. Fold down along to dotted lines of the template. Remove the template from the aluminum. Flip the windmill over so that the curves are facing upwards and flatten the none curved pieces.
- Make a dot using the black marker in the centre of the windmill.
- Cut the straw so that it measures 5 cm long.
- Insert the straw snuggly into the hex nut. Hot glue the flat part of the hex nut to the pie tin. You now have the top piece of the windmill!
- Make a dot using the black marker in the centre of the second aluminum tin.
- Using the modelling clay, create a small mound on top of the black marker dot.
- Insert the flat end of the wooden skewer into the modelling clay mold and secure. Make sure that the skewer is very straight and the pointed end of the skewer is facing up.
- Place the straw end of the top piece of the windmill onto the skewer. Test if the windmill spins smoothly.
- Place 4 candles evenly spaced in the aluminum tin.
- With help from an adult, light each candle. As the heat from each candle rises, it creates wind which will spin your windmill. Watch as it spins!
WHY DOES THIS HAPPEN
As the heat rises it creates a wind force that rotates the windmill. If your workspace has air blowing (such as high air conditioning), this may effect how your windmill blows. The straighter the candle flames are, the more wind force will be created, which will move your windmill more consistently.
PRINT, CUT, AND USE THIS TEMPLATE: